|
Ok, here’s a mod that helps performance and cosmetically makes your ride look “cooler”. You got those nice 18” rims and perfect tires. Your car is lowered and is now turning heads everywhere you go. Your calipers are nicely matched to your car, but something is missing. Your brake rotors are looking outdated, sure they still work, but it just doesn’t match because everything in there is new except for your rotors. Well, here’s how to change all that. I opted for the Stillen Cross drilled rotor from Bekkers setup over the slotted rotors. Why? I’ll be honest, I just think they look better and these particular rotors from Stillen can be used with stock pads. Don’t know how much better they perform than slotted rotors, but the choice is yours. Also covered in this “tech” article is the replacing of your brake pads. This should be done when you replace your rotors. Why? Because, there are grooves in your stock rotors and this causes grooves in the brake pads, when you switch over to brand new rotors, you don’t want that groove in your pads cause they’ll cause your new rotors to do the same and that is no good for cross drilled rotors. Here are the things you’ll need:
- Brake rotors to replace your stock rotors.
- New brake pads.
- Basic metric wrench set and metric allen wrench set.
- Jackstands.
- Brake pad lubricant.
- Brake caliper piston compressor (can be purchased at any auto store for less than $5.
- Punch
- Small flathead screwdriver.
- These instructions because the books make it look too damn easy. Example “Now simply remove the engine and transmission, and you’re done”. Hehe….never that easy is it fellas.
- $200 to give to your girlfriend/wife to go shopping with so she won’t keep nagging you to stop working on your damn car. Sorry for the lame humor.
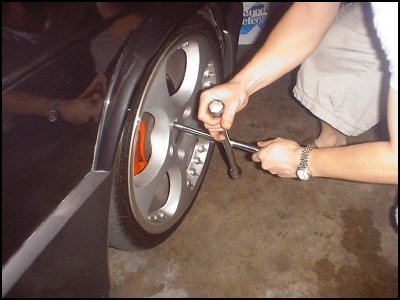
 Like always, loosen lug bolts and jack the car up. Then place on jack stands and remove the wheel.
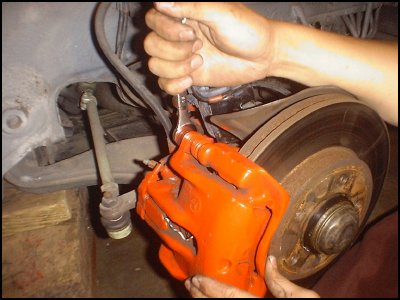
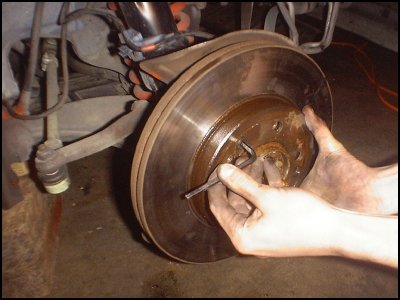
 Loosen the caliper bolt that holds the pads in. Not the mounting bolt!! You only need to remove the bottom bolt. I know that in the picture it shows me removing the top bolt, but that was before I learned that you didn’t have to remove both. You may need to loosen the top bolt a little though in order for that piece to swing up.
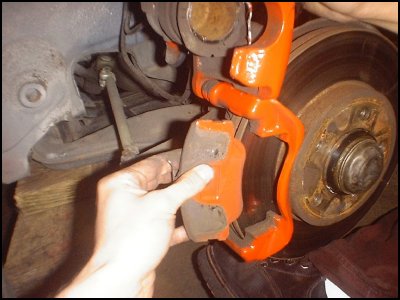
 After the bottom bolt has been removed, swing that metal piece of the caliper up. It will probably take some yanking to get it up (hehe). But once done, you can take out the brake pads. Just undo the clip on the pad and remove the pads like a cartridge.
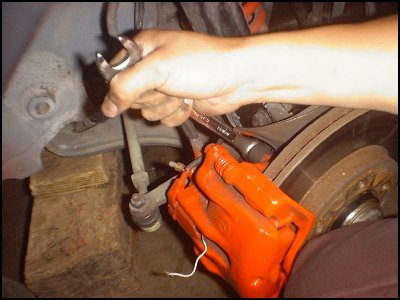
 From here, instead of replacing the pads with new ones, it’s time to remove the rotor. On the back of the caliper will be two mounting bolts. Remove these bolts. Slide the caliper off. Don’t let the damn thing dangle with only the brake line holding it. Place it on a block or string it up somehow.
Get a small flathead screwdriver and pry off the Mercedes three star hub cap dealy. It is on the end of the hub and is about 1.5” diameter.
 If you look on your rotor, there will be a small allen bolt holding the rotor on. You will need an allen wrench to remove this bolt. Make sense? When this bolt is removed, it’s time to take that rotor off. Some cars may be easy, but others, (like mine) will be a pain in the ass to get that rotor off. It may be rusted on the other side on the hub and will take a lot of beating to get the rotor off. Don’t give up. I found an easy way to do it. Get under the car with a sledge hammer, (no…..really) use the hammer end and pound the rotor until it comes off. Have your buddy there to rotate the rotor every other hit and catch it when it flies off. I use a 10 lb. Sledge, the heavier the better. If you want to be more safe and delicate, place a block of wood on the rotor to avoid metal to metal contact or use a rubber mallet of some sort, you may have to hit it longer though. I speak from experience folks, it may sound brutal and slightly on the ghetto side of mechanics, but once you get there, you’ll understand. You may want to clean up some of the rust build up in there and even some Vaseline to avoid future rust. Wow, you’ve found Vaseline can be used for more than one purpose. ;-)
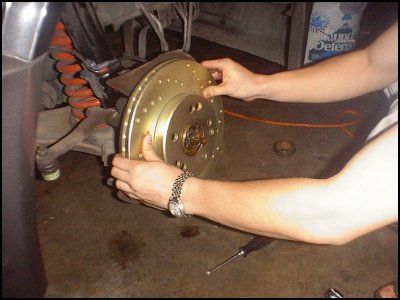
 Time to put the new rotor on, line it up with the allen bolt. Use the brake piston compressor now to push the piston in allowing ample room for the new thicker pads. Now re-mount the Caliper body with the two mounting bolts.
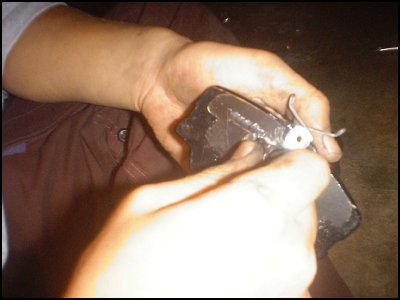
 Make sure you use the brake pad lubricant as shown in the picture. DO NOT put the lubricant on the pad side (side that makes contact with the rotor)!! Slide in the new pads, if you can get the sensor back in place, great. If not, don’t lose sleep over it. The sensor only warns you if the pad is about to run out. So, it’s not really necessary if you can’t get it to its original place.
 Swing that metal piece back down. You should hear a nice clicking noise and the pads should be in place. Put the caliper arm bolt back in. Don’t forget to put that 1.5” Mercedes Star back in place. You’ll have to line the grooves up and knock it back in place. Put the wheel back on and lower it. Now get in your car and pump the brakes a safe 3 times to re-engage the brake caliper pistons.
NOTE: For the rear set up, it is quite similar except you’ll need to use a punch to get the two pins out that are holding the brake pads in. The rest is very similar. You may need a wide mouth vice grip or c-clamp to push the piston in on the rear as the brake caliper piston compressor may not fit the same for the rear. Good luck. If you have more questions. Email me at: notnilC20@hotmail.com.
Regards,
Clinton Davis
'86 190E 2.3-16V
Back
|