![]()


![]()
"The Place for all 190 Enthusiasts"
TIMING CHAIN / TENSIONER REPLACEMENT
|
Parts required:
Tools required:
The first thing to do is to disconnect the negative cable on the battery. Then, remove the skid shield beneath the engine.
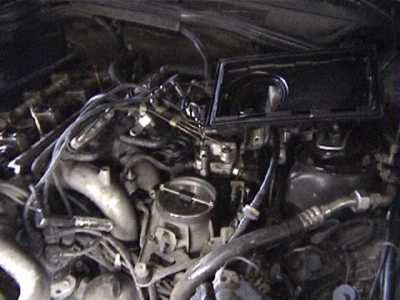 Next, you have to remove the air cleaner housing. To do this, take the cover off. Then, remove the two nuts on either side of the housing. Next, lift the back of the housing up, until it's clear of the gasket. Then, slide it back towards the firewall until the front slips out of the clip.
 Now, you have to remove the belt. First, loosen the belt tensioner locking bolt. It's located between the power steering pulley and the belt tensioner pulley.
 Then, loosen the belt tensioner adjustment bolt, until you can slip the belt off of the tensioner pulley.
 Now you have to get the alternator out of the way. First, remove the top mounting bolt. Then, loosen the lower one. Finally, slide the alternator to the left, out of the way.
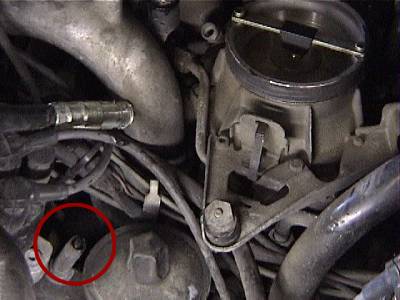
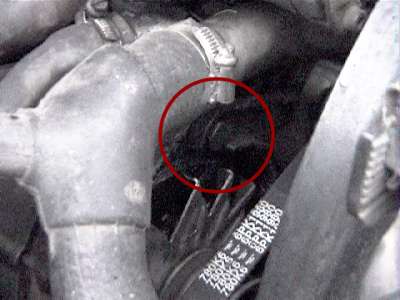
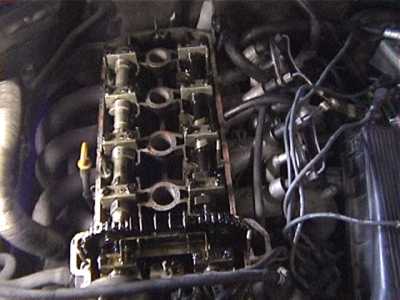
OK, now it's time to remove the old timing chain tensioner! It's the big nut in the engine block that the alternator was hiding. First, unscrew the tensioner retaining nut (the inside one). WARNING: There's a spring inside of the tensioner that puts pressure on this nut, so be prepared for it to jump out at you. After you get the nut out, unscrew the timing chain tensioner housing (the larger nut) and take it out. NOTE: If you don't wish to change the timing chain, skip the next 7 steps. 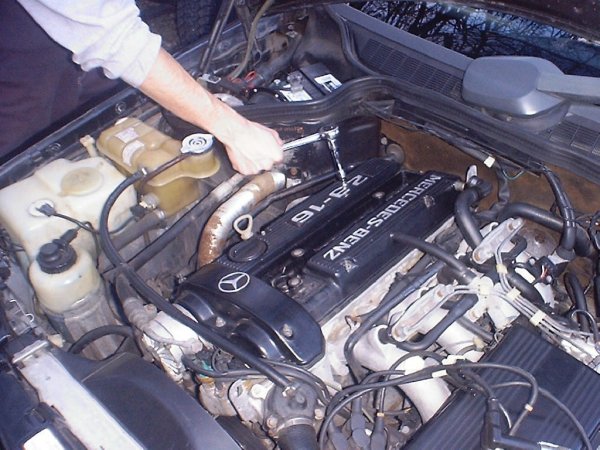 Now you have to remove the valve cover. First, remove the spark plug cables from the spark plugs but leave them on the distributor and move then aside but write down what wire goes where. There are a total of 7 bolts you have to loosen. Be careful not to lose the washers. Remember to carefully remove the two vacuum hoses from the valve cover before removing it. Now carefully remove the valve cover. If it is stuck, use a rubber mallet of some sort to get it loose. Take the cover off and then place the cover in a safe clean place.
 Now that your valve cover is removed, you must be careful not to get any debris into the engine. Debris = BAD FOR ENGINE. This is also the time to check the valve cover gasket also. If it feels charred or if it has any cracks or tears, it needs to be replaced.
 It's time to change the timing chain. First, lay rags over the cams and around the cam sprockets to prevent metal chips from getting into the engine. Then take the electric dremel and grind off the peened pins of one of the links on the LEFT side of the exhaust cam. This is important, as when you feed the new chain in, it has to pass across the exhaust cam sprocket, so the engine stays in time. Next, take a straight screwdriver and pry the link off. BE CAREFUL NOT TO DROP IT INTO THE ENGINE! Then, take some wire and fasten it to the end of the timing chain that's coming from the inside of the motor, then fasten the wire somewhere to the engine compartment. This is to prevent the end of the chain from falling down into the engine.
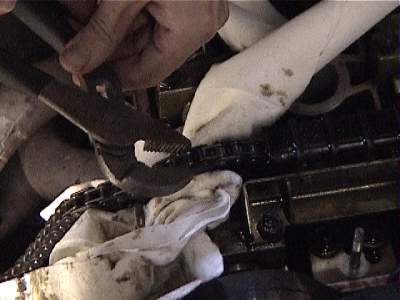 Now, get the new timing chain and connect it to the old chain, using the supplied link. Use the channel locks to clamp the link together, but don't peen it yet. Now, comes the fun part! Have a friend turn the engine in a clockwise direction, using the crank pulley bolt, while you keep tension on the old chain coming out of the engine and put pressure on the new chain running over the cam sprockets. The pressure is needed to keep the chain from jumping a tooth and getting out of time. Once the new chain has been fed in all the way, and the end is on the exhaust cam sprocket, disconnect the old chain by prying the link apart. DON'T DROP IT INTO THE ENGINE!!
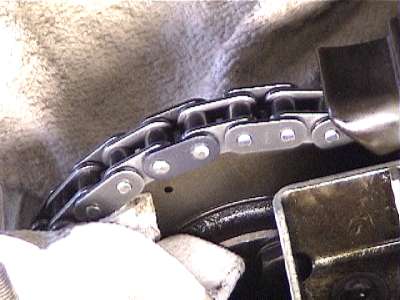 Now, connect the ends of the new timing chain together with the new link you just removed. Be sure that the side of the link that needs to be peened is facing towards the front of the engine. If you want to be safe, tie some wire to the ends of the new chain. It only takes a split second to drop the chain into the engine and it takes hours to fish it back out. Trust me :-). Once you have the link together, get a big block of metal and the peening hammer. With the block of metal against the backside of the link, peen the front until the edges of the pins are flattened out. Congrats! You have just installed the new timing chain.
Next, you need to check to make sure the timing is still correct. Slowly turn the crank in a clockwise direction, until the "0|T" mark on the crank pulley lines up with the pointer on the engine block. This can be seen from the driver's side of the engine compartment. Be careful and always keep pressure on the chain. Without the tensioner installed, the chain can jump a tooth when the engine is being turned. When the crank is aligned at TDC (Top Dead Center, or 0 deg.), find the 2mm holes on the cam sprockets. These should be aligned opposite of each other, level with the cylinder head. If they're aligned in-correctly, then you'll have to fiddle with the crank and the cams until you have enough slack in the chain to turn the cams without moving the chain. Double check the timing, then tell yourself: "You da MAN!!"  Now, you're ready to install the new timing chain rail. It's really easy. First, remove the nuts that hold the bracket in place. Then, remove the bracket from the cylinder head, take off the snap rings, then slide the old rail off. Next, install the new rail. Make sure it's exactly the same as the old one. The one I got had the right dimensions, but didn't have the notch for clearance for the cam sprocket. Make sure the rails are the same, then install the new one on the bracket and put the snap rings on. Next, reinstall the bracket on the cylinder head. Be sure to tighten the nuts to 15 ft-lbs.
The next step is to install the new timing chain tensioner. First, screw the tensioner housing into the engine block and tighten to 56 ft-lbs. Then, insert the plunger into the housing. The plunger should be loosely lying inside the tensioner housing because the spring will move it to the correct position. Now comes the tricky part. Insert the spring, along with the green pin, into the housing. Then, screw the tensioner retaining nut into the housing. This part is a little difficult because you have to compress the spring. The best way to do this, if you, like me, don't have enough grunt to compress the spring and turn at the same time, is to use a pry bar to compress the spring while you turn the nut. You should hear the plunger click into place. Well, now it's time to put things back together. When you put the valve cover back on make sure there is no dust or hair in it as well as the engine. Torque the bolts to 11 ft-lbs. Next, swivel the alternator back to the correct position and put the mounting bolt back in. Don't forget to tighten the lower one, too. Now, put the belt back on. Make sure it's on all the pulleys correctly, then tighten the belt tensioner adjustment bolt until the adjustment arrow is at the 7th divisional mark from the left. Then tighten the belt tensioner locking bolt. Now, put the air cleaner housing and the spark plug wires back on. Lastly, put the skid shield back on. Reconnect the battery, fire 'er up, then have some beer! Cheers! Daniel Miller
|

| Main + About the Site + Readers' Rides + Tech + Hall of Shame + 190E Forum + Links + The Gallery + For Sale + Guestbook |